Do you use QuickBooks Desktop along with other business apps? Maybe you use one app for inventory, another for online orders, and another for customer information. If you have to enter the same data into QuickBooks every time, it can get tiring pretty quickly.
This is where QuickBooks Web Connector can make things easier. It connects QuickBooks Desktop with supported third-party web applications and helps move data between them. This means you can spend less time copying information and reduce the chances of making manual entry errors.
In this guide, we’ll show you how to install and set up QuickBooks Web Connector, connect it to a third-party app, and manage your QuickBooks integrations.
What Is QuickBooks Web Connector?
QuickBooks Desktop Web Connector is a free Windows application developed by Intuit that helps connect QuickBooks Desktop with supported third-party applications. Instead of managing each integration separately, it provides a single place to set up and manage connected apps.
System Requirements for QuickBooks Web Connector
Before starting the QuickBooks Web Connector installation, make sure your computer and QuickBooks environment meet the necessary requirements.
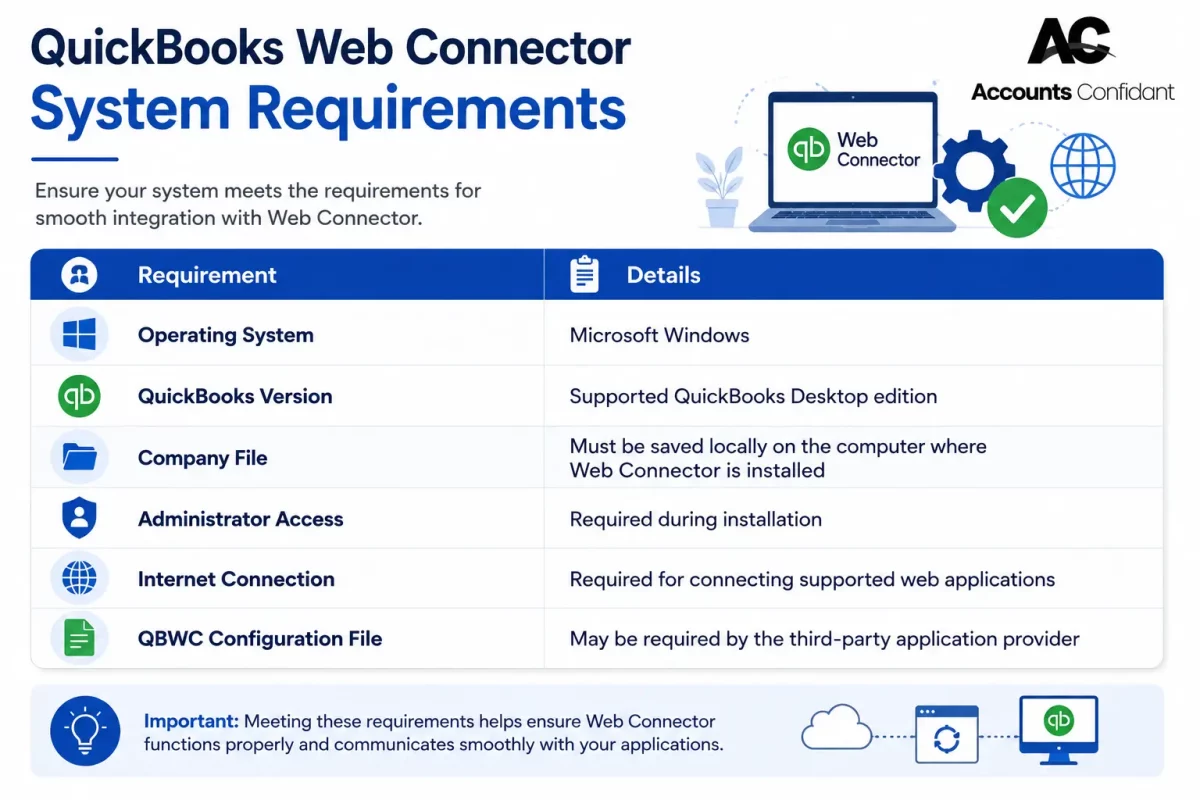
It’s also a good idea to confirm which QuickBooks Web Connector version your third-party application supports. If necessary, contact the application provider before installing the software.
How to Install and Set Up QuickBooks Web Connector?
Before you begin, keep the following points in mind:
- QuickBooks Web Connector configuration can only be initiated on the computer where the QuickBooks company file is stored locally.
- Download the installer from the Intuit Developer website.

- If the latest version isn’t compatible with your environment, you may need to install an earlier version recommended by the application provider.
- Some applications require a QBWC configuration file (.QWC) to complete the connection. If you don’t have one, contact the third-party vendor before starting the setup.
- Before installing Web Connector, make sure QuickBooks Desktop is properly installed and configured on the computer where your company file is stored.
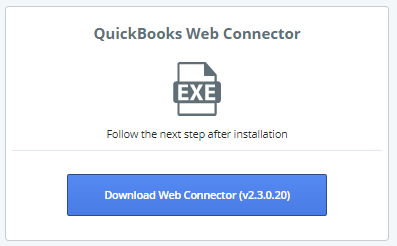
Follow these steps to complete the installation:
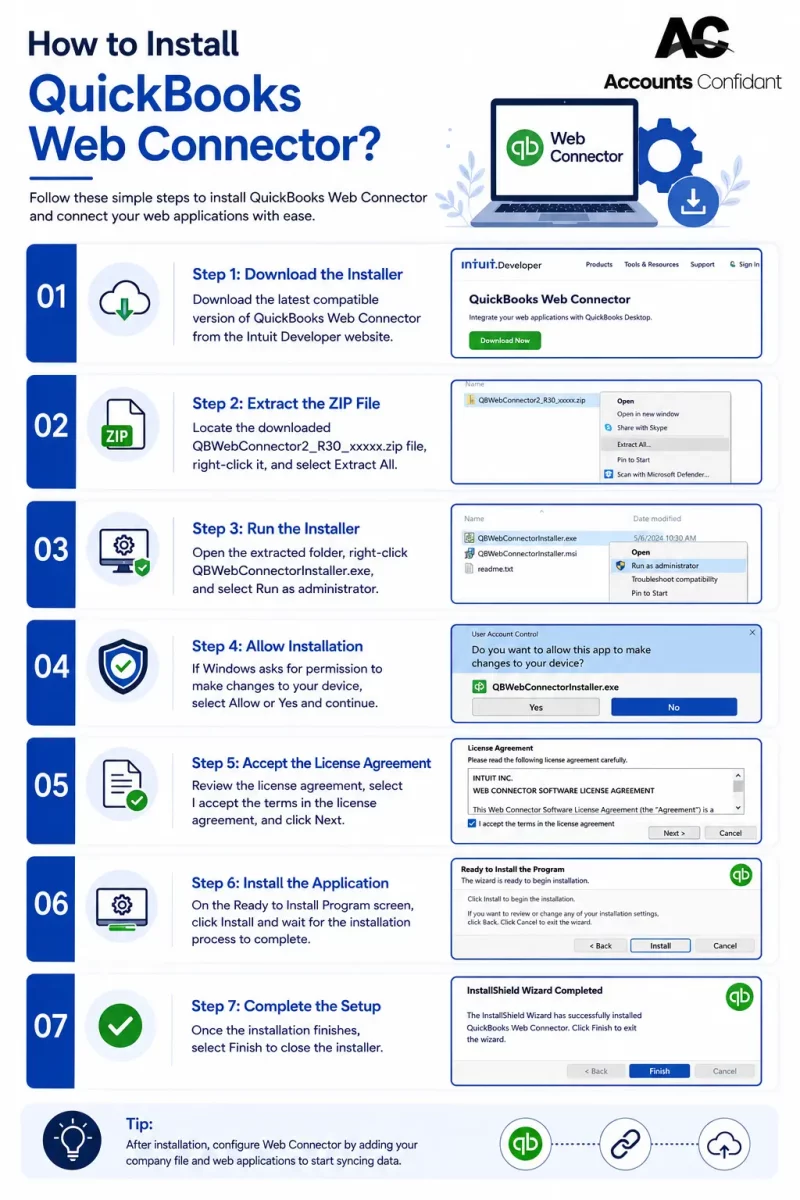
- Make sure to close QB Desktop first.
- Once you are done, download the latest compatible version of QuickBooks Web Connector from the Intuit Developer website.
- Next, extract the zip file by right-clicking the QBWebConnector2_R30_xxxxx zip file.
- Then open the extracted folder, right-click QBWebConnectorInstaller.exe, and select Run as administrator.
- Keep following the prompts, and if Windows asks for permission to make changes to your device, select Allow or Yes and continue.
- After reviewing, accept the terms in the license agreement, and click Next.
- On the Ready to Install Program screen, click Install and wait for the installation process to complete.
- Once the installation finishes, select Finish to close the installer.
Note: If the latest version doesn’t install successfully, there are older versions of QuickBooks Intuit Web Connector that may be compatible with your QuickBooks Desktop release.
If you are still facing problems, refer to the next section of our blog.
What to Do If QuickBooks Web Connector Does Not Install?
In some cases, QB Web Connector may not install correctly.
To reinstall the Web Connector:
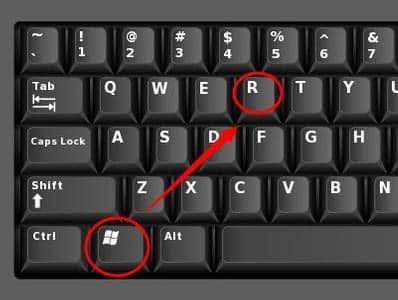
- Press Windows + R to open the Run dialog box.
- Type Control Panel and click OK.
- Select Uninstall a program.
- Choose QuickBooks Web Connector, then select Uninstall.
- If QuickBooks Web Connector isn’t listed in Control Panel, delete the QBWebConnector folder from the appropriate QuickBooks installation directory before reinstalling the application.
- Now, follow the installation steps again.

Finally, we will learn about the Web Connector’s third-party integration.
How to Connect and Manage Third-Party Apps with QuickBooks Desktop
After installing this QuickBooks integration tool, you can connect supported third-party applications with QuickBooks Desktop.
- The first thing you need to do is log in to QuickBooks Desktop as the admin and sign in to your Intuit account
- Once you are done, from the QuickBooks Desktop menu, go to: File > App Management > Manage Web Apps
- Next, you need to find the third-party application you want to connect to and select Set Up, and it will redirect you to the application provider’s website where you can sign in.
- On the application website, select Connect to QuickBooks.
- Return to QuickBooks Desktop and select Done on the Access Confirmation screen.
- Once completed, the application will appear under Connected Apps and can exchange supported data with your QuickBooks company file.
To manage third-party apps with QuickBooks Desktop, follow these steps:
- Open QuickBooks Desktop.
- Log in using your Admin account.
- Go to File > App Management > Manage Web Apps.
- Connect the app by selecting Connected Apps.
- Once connected, you can manage your application from the Connected Apps section in QuickBooks Desktop.
Suppose you want to remove an app that you no longer use, we also have steps for that. Keep reading.
Removing Connected Applications from QuickBooks
If you no longer use an application, follow these steps:
- Open QuickBooks Desktop.
- Go to File > Manage Web Apps.
- Select the application you want to remove.
- Click Remove.
- Wait for the confirmation message before continuing.
The steps for QB Preferences differ.
Remove the Application from QuickBooks Preferences
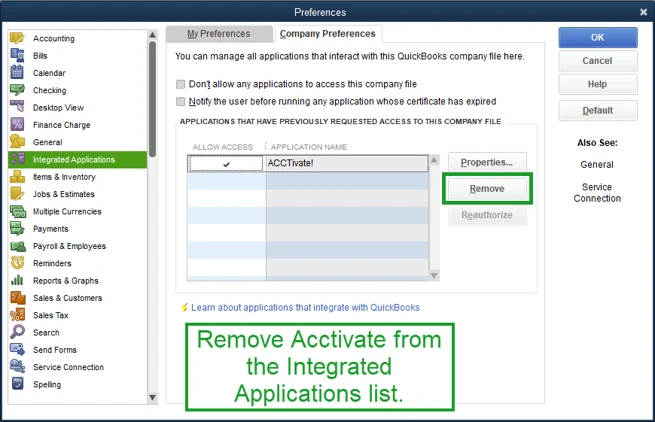
- Go to Edit > Preferences.
- Select Integrated Applications.
- Open the Company Preferences tab.
- Select the application.
- Click Remove, then OK.
- Open Web Connector and check Connected Apps.
- If the application is still listed, select Remove again.
Following these steps helps prevent the application from becoming stuck in Web Connector.
You can also transfer an app to another device.
How to Transfer an App to Another Device
If you’re moving your company file to another computer, you can transfer the application connection instead of setting it up again.
To transfer an app:
- Open QuickBooks Desktop.
- Sign in as the Admin user.
- Go to File > App Management > Manage Web Apps.
- Select Connected Apps.
- Choose Transfer App to my device.
- Complete the transfer process on the new computer.
Once the transfer is complete, the application is disconnected from the previous device and connected to the new one.
Conclusion
QB Web Connector helps businesses connect third-party applications with QuickBooks Desktop and manage integrations from one place. By downloading the correct version, completing the installation, and following the proper setup steps, users can simplify data exchange and improve workflow efficiency.
Always use the recommended Web Connector version and obtain any required QBWC configuration file from the application provider for a smooth connection experience. If you still face issues, it’s best to seek professional support.
Frequently Asked Questions
What is QuickBooks Web Connector?
QuickBooks Web Connector is a free Windows application developed by Intuit that connects QuickBooks Desktop with supported third-party applications. It provides a single place to set up and manage connected applications.
How does QuickBooks Web Connector work?
QuickBooks Web Connector allows supported third-party applications to communicate with QuickBooks Desktop. After authorization, the application can exchange supported data with your QuickBooks company file.
Why do I need QuickBooks Web Connector?
QuickBooks Web Connector is useful when you want to connect QuickBooks Desktop with third-party applications. It helps manage integrations and reduces the need for manual data transfer.
Is QuickBooks Web Connector free?
Yes, QuickBooks Web Connector is available at no additional cost for supported versions of QuickBooks Desktop.
Can I use QuickBooks Web Connector with QuickBooks Desktop?
Yes, QuickBooks Web Connector is designed for supported QuickBooks Desktop versions.
Does QuickBooks Web Connector work with QuickBooks Online?
No, QuickBooks Web Connector is designed for QuickBooks Desktop and is not used for QuickBooks Online.
Why is QuickBooks Web Connector not working?
QuickBooks Web Connector may not work if the application setup is incomplete, the required QBWC file is unavailable, or the connected application is not compatible with your QuickBooks Desktop version.
How do I fix QBWC1039?
QBWC1039 is usually related to application connection or configuration problems. Verify that the application is set up correctly and that you are using the correct QBWC configuration file provided by the application provider.
How do I fix QBWC1041?
QBWC1041 may occur because of authorization issues with the company file or connected application. Make sure you are signed in as the QuickBooks Admin and reconnect the application if required.
Why won’t QuickBooks Web Connector connect?
Check that you are using the correct QuickBooks company file, signed in as the Admin user, and following the setup instructions provided by the application provider. Also confirm that you are using a compatible Web Connector version.
How do I fix QuickBooks Web Connector login failed?
A login failure can happen because of incorrect credentials or authorization issues with the connected application. Verify your login details and reconnect the application through QuickBooks Web Connector.
Why is my QBWC file being rejected?
A QBWC configuration file may be rejected if it is outdated, incorrect, or incompatible with the application. Contact the third-party application provider to request the correct .QWC file.
How do I resolve QuickBooks Web Connector SSL certificate errors?
SSL certificate errors are generally related to the connected application’s security certificate. Contact the application provider to verify that the certificate is valid and properly configured.